Removing margins in gnuplot

I’ve had some fun creating plots in gnuplot lately, and happened across one of those “it works everywhere but not for my setup” type problems. Here’s my setup/aims:

  • using Mac OS X 10.6 and gnuplot 4.6
  • generate plots to use in LaTeX, i.e. either PDF or EPS output
  • change the standard ratio of the plot canvas from around 4:3 to “a bit wider and less high” (in order to fit the standard width of my 1 column LaTeX text without taking up half of the page)
  • have no or only little unnecessary whitespace around the plot

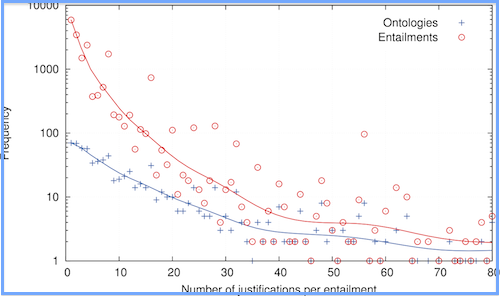
This seems to be impossible in gnuplot, as the usual (since gnuplot 4.4 or so) way to change the plot and canvas size “set size …” works differently for the postscript terminal. You can change the plot size or aspect ratio, but not the canvas size, which results in lots of whitespace around the plot, see the picture below where the blue frame marks the bounding box of the resulting eps.

plot11

This is obviously not great, but there seems to be now way around it other than manually removing the whitespace, e.g. in Preview. After some digging, however, I came across the eps2eps tool (happened to be installed on my machine already) which “fixes” the bounding box and removes unnecessary whitespace. Unfortunately, for some unknown reason, it also rotates the resulting image by 90 degrees clockwise and there are no options to rotate or prevent rotation of the output. Ugh.

After some more digging, I found yet another tool, eps2pdf, which converts an EPS image to PDF – and happily accepts a rotation parameter. I simply downloaded the EPS tools package and copied the three files into /usr/bin and made them executable to run them. Et voila, I’ve got a 3-tool-pipeline for generating margin-less plots – see the resulting graphic below.

In the plot file:

set size ratio 0.6
set terminal postscript enhanced color
set output 'frequency.tmp.eps'

My script (plot.sh) for generating the PDF output:

gnuplot $1.plt
eps2eps $1.tmp.eps $1.eps
eps2pdf -r -90 $1.eps
rm $1.tmp.eps

Run the script with

sh plot.sh frequency

And here’s the resulting PDF – beautiful, non?

plot2

MySQL workbench on Mac OS “Error 1046 – No database selected”

While playing around with the triple stores and a MySQL db on our Macs, I ran into a little problem when trying to change a column name in one of the tables in the MySQL database. The error message I got from the MySQL workbench was mildly confusing:

Error 1005: Can’t create table ‘families’. (errno: 13) […]

Error 1046: No database selected

Since the query was automatically generated by the MySQL workbench, I presumed it had to be correct. A bit of googling, and this friendly chap’s forum post helped me find the solution to the problem: Access rights. As always. Here’s how you allow the MySQL user to write to the MySQL directory:

Find the name and group of the MySQL user in /etc/group and /etc/passwd respectively:

less /etc/group
less /etc/passwd

On our Mac OS X 10.7 Mac mini with a default MySQL 5.5 install, the user name and group is _mysql. 

Then set the owner and mode of the MySQL install directory:

cd /usr/local
sudo chown -R _mysql:_mysql mysql-5.5.25-osx10.6-x86_64/
sudo chmod -R 755 mysql-5.5.25-osx10.6-x86_64/

This may be obvious, but make sure you chown/chmod the actual MySQL directory, not the symlink in /usr/local which is named mysql.

That’s it – you should be able to modify your database now.

Installing OpenRDF Sesame on a Mac Mini

And now for the third in a row of triple-store installations. This time it’s Sesame, an open source datastore for RDF and relational data. Thankfully, due to the minimal requirements and the pretty good documentation, the installation was quick and much less painful than expected.

Hardware: Apple Mac Mini (running Mac OS X Lion 10.7), out of the box

I followed mostly the instructions given  on http://www.openrdf.org/doc/sesame2/users/. They explain stuff quite well, so it was actually rather enjoyable to read. You can also find a diagram of the Sesame components, which is helpful. Study and memorise!

sesame architecture

1) Set up environment: Logging

  • Download SLF4J (1.6.6. at time of writing) to get the correct bridge file (slf4j-log4j12-1.6.6.jar) to work with log4j:
  • http://www.slf4j.org/download.html
  • set Java class path to use the log4j bridge jar file: Add the following to the ~/.profile:
  • CLASSPATH=/Users/fishdelish/fishbench/slf4j-1.6.6/slf4j-log4j12-1.6.6.jar
2) Set up Tomcat server

(Sesame doc mentions 5.5 or 6.0, so I went with 6.0 instead of 7.0 just to be on the safe side)

3) Sesame server / workbench installation

>> Workbench is accessible on http://127.0.0.1:8080/openrdf-workbench

Sesame should be up and running now!

The default data directory on Mac OS X is /Users/fishdelish/Library/Application Support/Aduna/OpenRDF Sesame

4a) Create a repository and import RDF data using Sesame console

Create a new store: either in-memory or native. I chose native due to the relatively small RAM on our machines: “The native store uses on-disk indexes to speed up querying.”

In the console, type:

  • create native. (then fill in id and description)
  • open testfish.
  • load /Users/fishdelish/fishbench/testfish.n3.

To exit the console: use exit. or quit.

4a) Create a repository and import RDF data using the Java API

Or do the same using the SesameJava API. Good explanation of the Java API in section 8.2 on http://www.openrdf.org/doc/sesame2/users/ch08.html – I’m just giving you the rough outlines of the code, without error handling etc.

Create repository:

File dataDir = new File("/path/to/datadir/");
Repository myRepository = new SailRepository(new NativeStore(dataDir));
myRepository.initialize();

Import data:

File file = new File("/path/to/example.rdf");
String baseURI = "http://example.org/example/local";
RepositoryConnection con = myRepository.getConnection();
con.add(file, baseURI, RDFFormat.RDFXML);

5) SPARQL query time!

Connect to repository using the Java API:

String sesameServer = "http://example.org/sesame2";
String repositoryID = "example-db";
Repository myRepository = new HTTPRepository(sesameServer, repositoryID);
myRepository.initialize();

Then simply query the Repository() object, as described in the documentation.

That’s it. As with all instructions, I can’t guarantee that it will work correctly, I have yet to stress test my setup as well.

Installing Virtuoso Open Source on a Mac Mini

Part 2 of the “Things PhD students do on a saturday night” series: Having successfully installed 4store on our brand new Mac Mini running OSX 10.7 (Lion), I went on to tackle the next candidate for our triple-store-o-rama: Virtuoso (Open Source Edition).

I followed mostly the instructions on the Virtuoso wiki, which are not quite as nice as the 4store ones, but managed to get me through the installation process without major incidences: http://virtuoso.openlinksw.com/dataspace/dav/wiki/Main/VOSMake

A short and clear overview of the installation process can be found on Kingsley Idehen’s blog.

Here we go:

Hardware: Apple Mac Mini (running Mac OS X Lion 10.7), out of the box

Install dependencies

If you’ve previously installed 4store, some of these might already be installed. You’ll also need fink, which I’ve described in the previous post. Using fink install, install the following libs:

  • autoconf
  • automake
  • libtool
  • flex
  • bison (which will also install gawk)
  • gawk
  • gperf
  • m4
  • make
  • OpenSSL

If one of them won’t install, check with fink list pkgname what the alternative package name is and whether it’s already installed. If it’s already installed, this will be indicated by an “i” in the first column of the results that fink list returns.

Install Virtuoso

1) Download Virtuoso Open Source version:
curl -O -L http://downloads.sourceforge.net/project/virtuoso/virtuoso/6.1.5/virtuoso-opensource-6.1.5.tar.gz
(-L is necessary to ensure curl follows the redirect to the respective mirror on SourceForge, took me a while to figure that out…)

2) Unpack the tarball:
tar -xvzf virtuoso-opensource-6.1.5.tar.gz

3) Set compiler flags (check out the Make FAQ for a list of settings on other systems)

  • CFLAGS=”-O -m64 -mmacosx-version-min=10.7″
  • export CFLAGS

4) Configure and install:

  • ./configure
  • make
  • sudo make install (the instructions say it installs to /usr/local/ by default, the resulting path is /usr/local/virtuoso-opensource)

5) Add path to the bin directory to the PATH environment varibale in ~/.profile:

Open text editor and add:
PATH=$PATH:/usr/local/virtuoso-opensource/bin/

Starting Virtuoso and importing data from a file

1) Add directory which contains data file to virtuoso.ini:
sudo emacs /usr/local/virtuoso-opensource/var/lib/virtuoso/db/virtuoso.ini
>> Add the directory path to DirsAllowed parameter, e.g. in our case /Users/fishdelish/fishbench/tests/testfish.n3

2) Start the Virtuoso server:

  • cd /usr/local/virtuoso-opensource/var/lib/virtuoso/db/
  • sudo virtuoso-t -f (or use sudo virtuoso-t -f & if you want to start it independently from the shell you’re using)
  • (virtuoso-t will read the virtuoso.ini file in this directory)

3) Import data:
(see some information and screenshots here:) http://www.proxml.be/users/paul/weblog/3876f/

Connect to DB to get an SQL prompt:

  • isql <HOST>[:<PORT>] -U username -P password
  • or simply isql 1111 myuser mypassword, this connects to the default port 1111

Import data (from n3 format, otherwise use DB.DBA.RDF_LOAD_RDFXML_MT from RDF/XML)

4) Access via http: 

Shutting down the server
Open SQL prompt and use command SHUTDOWN;

When the server isn’t shut down properly, there might be problems starting up next time. Manually removing virtuoso.lck in the virtuoso/db directory can solve this.

Get Your Triples On: Installing 4store on a Mac Mini

For a recent project, we had to install a selection of RDF triple stores on a Mac Mini, which had literally just come out of the box. Since it was a bit of a mission to get everything up and running, I thought I’d better keep track of what I did. Here’s the steps taken to prep the machine and set up 4store  – it looks pretty long, but if everything works (if…), it shouldn’t take more than 15 minutes. May the odds be forever in your favour.

Hardware: Apple Mac Mini (running Mac OS X Lion 10.7), out of the box

Install XCode, Command Line Tools, and Java on the Mac:

  • Install XCode via the AppStore (if you can only access remotely, use screen sharing)
  • The command-line tools are not bundled with Xcode 4.3 by default. Instead, they can be installed optionally using the Components tab of the Downloads preferences panel in Xcode.
  • Change the XCode Developer directory (which no longer exists in 4.3) to the new directory:
  • sudo /usr/bin/xcode-select -switch /Applications/Xcode.app/Contents/Developer/

Install Fink on the Mac to be able to use apt-get etc. (needs XCode + Command line tools)

Install dependencies using Fink

  • List of dependencies on: http://4store.org/trac/wiki/Dependencies
  • apt-get doesn’t find the right packages, so you have to use the fink tool to install them manually:
  • fink install automake1.11
  • fink install autoconf2.6
  • fink install glib2-dev
  • fink install make
  • fink install pcre
  • fink install pcre-bin

All other libs seem to be installed already. Then set your .profile file to init fink on startup:

  • open ~/.profile file with your text editor of choice:
  • . /sw/bin/init.sh

Install 4store
(I mostly followed the instructions here: http://fishdelish.cs.man.ac.uk/2011/installing-4store/)

1) Download and install Raptor

Raptor is an RDF syntax library, provides parsers and serializers.

2) Download and install Rasqual

Rasqal is a library that handles RDF query languages, e.g. SPARQL, supports all of SPARQL 1.0 and most of 1.1.

Make sure both rasqal and raptor have a .pc file in their directories. If not, you might have forgotten to run configure which should generate the .pc file from .pc.in.

3) Set environment variables so that the 4store install can find raptor2 and rasqal

Set to the directories which contain the raptor2.pc and rasqal.pc files:

  • open ~/.profile file with your text editor of choice:
  • PKG_CONFIG_PATH=/Users/fishdelish/fishbench/rasqal-0.9.29:/Users/fishdelish/fishbench/raptor2-2.0.7

4) Download 4store tarball (latest version on http://4store.org/download/) and install:

  • tar -xvzf 4store-v1.1.4.tar.gz
  • cd to the 4store directory
  • ./configure –enable-no-prefixes
  • Configure should run without error messages, i.e. raptor2 and rasqal are found if they environment variables are set correctly.
  • make && sudo make install
Congratulations! 4store should now be installed on your machine.

Run a series of tests to see whether 4store works:

  • make test (or make test-query, make test-httpd
  • tests should pass with [PASS], although some of them failed for me and the actual store worked fine

Create a triple store once 4store is installed
http://4store.org/trac/wiki/GettingStarted

1) Setup the DB:
4s-backend-setup testfish

2) And start the DB backend: 
4s-backend testfish
(Stop the DB: pkill -f ‘^4s-backend testfish$’ )

3) Import a test file:
(I just used a few triples I copied from from http://www.w3.org/TR/rdf-testcases/#ntriples)
4s-import -v testfish –format ntriples testfish.n3

Important: Import doesn’t work if the httpd is running. Also, make sure there’s no line breaks in the .n3 file.

4) Start http server for SPARQL endpoint and nice HTML frontend for tests:
4s-httpd testfish
(to kill the server, e.g. to import data: killall 4s-httpd)

That’s it. You should have a working 4store install and a sample DB now. Please be warned that I can’t guarantee that everything will work as it should if you follow these instructions 🙂