Stardog ASCII art power

I’ve just installed the Stardog RDF database for the first time (painless. Download, unzip to some directory, set an environment variable, done. TAKE A NOTE, triple stores.) and on server startup I was greeted with this wonderful peace of ASCII art:

screen-shot-2012-11-24-at-01-52-36

You’ve just won me over.

Edit: Downloaded, installed, and loaded one of the example files with Stardog in 2 minutes. User-friendliness win. Now, if you could perhaps explain what that mysterious “-t D” flag is…

$ ./stardog-admin create -n myDB -t D -u admin -p admin --server 
snarl://localhost:5820/ examples/data/University0_0.owl

Without the flag, the loading simply fails with “Authentication failed”. Eh.

Dog Food Conferences

Via the @EKAW2012 Twitter account I just landed on the “conferences” list on semanticweb.org. Since 2007, the conference metadata of several web/semweb conferences (WWW, ISWC, ESWC…) has been published as linked data, including the accepted publications (with abstract, authors, keywords, etc) and list of invited authors. Check out the node for my ISWC 2011 paper, for example.

I’m quite tempted to experiment with this and generate some meta-meta-data. Do you know of any applications using these data, or have you got any ideas what to do with it?

A SPARQLing Benchmarking Adventure

800px-brachydanio_rerio

As you can see from the pile of triple store/RDBMS related posts below, I’ve recently moved out of my comfort zone to explore a new territory: Linked data, SPARQL, and OBDA (Ontology-Based Data Access). Last year, the FishDelish project, which was steered by researchers at the Manchester University, created a linked data version of FishBase, a large database containing information about most of the world’s fish species (around 30,000). Access to such a large amount of (nice and real) data offered a good opportunity for further usage, and so we set out to generate a cross-system performance benchmark using the FishBase data and queries. While the resulting paper (which I co-authored with Bijan Parsia, Sandra Alkiviadous, David Workman, Rafael Goncalves, Mark Van Harmelen, and Cristina Garilao) wasn’t nearly as comprehensive as I had wished, I did learn a lot on the way which didn’t make it into the paper. Nevertheless, here’s a few thoughts about performance benchmarking of data stores, including a wish list for my “ideal benchmarking framework”.

Performance benchmarking in Java: It’s complicated.

Measuring execution time of Java code in Java code is known to be tricky when you’re moving in sub-second territory. The JVM requires special attention, such as a warm-up phase and repeated measurements to take into account garbage collection. A lot has been written about this topic, so I shall refer you to this excellent post on “Robust Java Benchmarking”  by Brent Boyer. On my wish list goes a warm-up phase which runs until the measurements are stabilised (rather than a fixed number of runs).

Getting the test data & queries

That’s an interesting one. There seem to be two kinds of SPARQL benchmarks: Those that use an existing dataset and fixed queries, taken from a real-world application, perhaps with some method of scaling the data (e.g. the DBpedia benchmark). And then there are benchmarks which artificially generate test data and queries based on some “realistic” application (e.g. LUBM, BSBM). Either way, we are tied to the data (of varying size) and queries. For our paper (and further, for Sandra’s dissertation), we tried to add another option to this mix: A framework that could turn any kind of existing dataset into a benchmark for multiple platforms. 

The framework (we called it MUM-benchmark, Manchester University Multi-platform benchmark) requires three things: A datastore (e.g. a relational DB) with the data, a set of queries, and a query mix. Each query is made up of a) a parameterised query (i.e. a query which contains one or more parameters) and b) a set of queries to query the database and obtain parameter values. In our implementation, the queries are held in a simple XML file – one for each query type (e.g. SPARQL, SQL). If there is an existing application for the data, the parameterised queries can simply be taken from the most frequently executed queries. In the case of FishBase, for example, we reverse-engineered queries to query for a fish species by common name, generate the species page, etc.

Additionally, I hacked BSBM to work with various datastores and added a standard SQL connection and an OBDA connection. While we have only tested our framework with the Quest OBDA system (with a FishBase ontology written by Sandra), this should work for all other OBDA systems, too (and if not, it’s fairly straightforward to add another type of connection).

One aspect which we haven’t had the time to implement is scaling the FishBase data by species. Ideally, we want a simple mechanism to specify the number of species we want in our data and get a smaller dataset. If we take this one step further, we could also artificially generate species based on heuristics from the existing data in order to increase the total number of species beyond the existing ones.

To my wish list, I add cross-platform benchmarks, generating a benchmark from existing data, scalable datasets, and easy extension by additional queries.

What to measure?

Query mixes seem to be the thing to go for when benchmarking RDF stores. A query mix is simply an ordered list of (say, 20-25) query executions which emulates “typical” user behaviour for an application (e.g. in the “explore use case” of BSBM: find products for given features, retrieve information about a product, get a review, etc.) This query mix can either be an independent list of queries (e.g. the parameter values for each query are independent of each other) or a sequence, in which the parameter value of a query depends on previous queries. As the latter is obviously a lot more realistic, I shall add it to my wish list.

For the FishDelish benchmark, we were kindly given the server logs for one month’s activity on one of the FishBase servers, from which we generated a query mix. It turned out that on average, only 5 of the 24 queries we had assembled were actually used frequently on FishBase, while the others were hardly seen at all (as in, 4 times out of 30,000 per month). Since it was not possible to include these into the query mix without deviating significantly from reality, we generated another “query mix” which would simply measure each query once. As the MUM-benchmarking framework wouldn’t do sequencing at the time, there was no difference between a realistic query mix and a “measure all queries once” type mix.

Finally, the third approach would be a “randomised weighted” mix based on the frequency of each query in the server logs. The query mix contains the 5 most frequent queries, each instantiated n times, where is the (hourly, daily) frequency of the query according to the server access logs.

How to measure!?

Now we’re back to the “robust Java benchmarking” issue. It is clear that we need a warm-up phase until the measurements are stabilised, and repeated runs to obtain a reliable measurement (e.g. to take into account garbage collection which might be triggered at any point and add a significant overhead to the execution time).

In the case of the MUM-benchmark, we generate a query set (i.e. “fill in” parameter values for the parameterised queries), run the query mix 50 times as a warm-up, then run the query mix several hundred times and measure the execution time. This is repeated multiple times with distinct query sets (in order to avoid bias caused by “good” or “bad” query parameter values). As you can see, this method is based on “run the mix x times” rather than “complete as many runs as you can in x minutes (or hours)”. This worked out okay for our FishBase queries, as the run times were reasonably short, but for any measurements with significantly longer (or simply unpredictable) execution times, this is completely impractical. I therefore add “give the option to measure runs per time” (rather than fixed number) to my wish list.

The results

This was something I found rather pleasant about the BSBM framework. The benchmark conveniently generates an XML results file for each run, with summary metrics of the entire query mix, and metrics for each individual query. As our query mix was run with different parameters, I added the complete query string to the XML output (in order to trace errors, which came in quite handy for one SPARQL query where the parameter value was incorrectly generated). The current hacky solution generates an XML file for each query set, which are then aggregated using another bit of code – eventually the output format should be a little more elegant than dozens of XML files (and maybe spit out a few graphs while we’re at it).

Conclusions

While modifying the BSBM framework I put together the above “wish list” for benchmarking frameworks, as there were quite a few things that made performing the benchmark unnecessarily difficult. So for the next version of the MUM-benchmarking framework, I will take these issues into account. Overall, however, the whole project was extremely interesting – setting up the triple stores, generating the queries, tailoring (read: hacking) BSBM to work across multiple platforms (a MySQL DB, a Virtuoso RDF store, a Quest OBDA system over a MySQL db) and figuring out the query mixes.

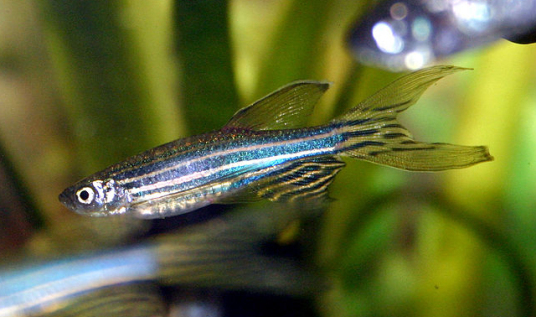
Oh. And I learned a lot about fish. The image shows a zebrafish, which was our preferred test fish for the project.

[cc-licensed image by Marrabio2]

Installing OpenRDF Sesame on a Mac Mini

And now for the third in a row of triple-store installations. This time it’s Sesame, an open source datastore for RDF and relational data. Thankfully, due to the minimal requirements and the pretty good documentation, the installation was quick and much less painful than expected.

Hardware: Apple Mac Mini (running Mac OS X Lion 10.7), out of the box

I followed mostly the instructions given  on http://www.openrdf.org/doc/sesame2/users/. They explain stuff quite well, so it was actually rather enjoyable to read. You can also find a diagram of the Sesame components, which is helpful. Study and memorise!

sesame architecture

1) Set up environment: Logging

  • Download SLF4J (1.6.6. at time of writing) to get the correct bridge file (slf4j-log4j12-1.6.6.jar) to work with log4j:
  • http://www.slf4j.org/download.html
  • set Java class path to use the log4j bridge jar file: Add the following to the ~/.profile:
  • CLASSPATH=/Users/fishdelish/fishbench/slf4j-1.6.6/slf4j-log4j12-1.6.6.jar
2) Set up Tomcat server

(Sesame doc mentions 5.5 or 6.0, so I went with 6.0 instead of 7.0 just to be on the safe side)

3) Sesame server / workbench installation

>> Workbench is accessible on http://127.0.0.1:8080/openrdf-workbench

Sesame should be up and running now!

The default data directory on Mac OS X is /Users/fishdelish/Library/Application Support/Aduna/OpenRDF Sesame

4a) Create a repository and import RDF data using Sesame console

Create a new store: either in-memory or native. I chose native due to the relatively small RAM on our machines: “The native store uses on-disk indexes to speed up querying.”

In the console, type:

  • create native. (then fill in id and description)
  • open testfish.
  • load /Users/fishdelish/fishbench/testfish.n3.

To exit the console: use exit. or quit.

4a) Create a repository and import RDF data using the Java API

Or do the same using the SesameJava API. Good explanation of the Java API in section 8.2 on http://www.openrdf.org/doc/sesame2/users/ch08.html – I’m just giving you the rough outlines of the code, without error handling etc.

Create repository:

File dataDir = new File("/path/to/datadir/");
Repository myRepository = new SailRepository(new NativeStore(dataDir));
myRepository.initialize();

Import data:

File file = new File("/path/to/example.rdf");
String baseURI = "http://example.org/example/local";
RepositoryConnection con = myRepository.getConnection();
con.add(file, baseURI, RDFFormat.RDFXML);

5) SPARQL query time!

Connect to repository using the Java API:

String sesameServer = "http://example.org/sesame2";
String repositoryID = "example-db";
Repository myRepository = new HTTPRepository(sesameServer, repositoryID);
myRepository.initialize();

Then simply query the Repository() object, as described in the documentation.

That’s it. As with all instructions, I can’t guarantee that it will work correctly, I have yet to stress test my setup as well.

Installing Virtuoso Open Source on a Mac Mini

Part 2 of the “Things PhD students do on a saturday night” series: Having successfully installed 4store on our brand new Mac Mini running OSX 10.7 (Lion), I went on to tackle the next candidate for our triple-store-o-rama: Virtuoso (Open Source Edition).

I followed mostly the instructions on the Virtuoso wiki, which are not quite as nice as the 4store ones, but managed to get me through the installation process without major incidences: http://virtuoso.openlinksw.com/dataspace/dav/wiki/Main/VOSMake

A short and clear overview of the installation process can be found on Kingsley Idehen’s blog.

Here we go:

Hardware: Apple Mac Mini (running Mac OS X Lion 10.7), out of the box

Install dependencies

If you’ve previously installed 4store, some of these might already be installed. You’ll also need fink, which I’ve described in the previous post. Using fink install, install the following libs:

  • autoconf
  • automake
  • libtool
  • flex
  • bison (which will also install gawk)
  • gawk
  • gperf
  • m4
  • make
  • OpenSSL

If one of them won’t install, check with fink list pkgname what the alternative package name is and whether it’s already installed. If it’s already installed, this will be indicated by an “i” in the first column of the results that fink list returns.

Install Virtuoso

1) Download Virtuoso Open Source version:
curl -O -L http://downloads.sourceforge.net/project/virtuoso/virtuoso/6.1.5/virtuoso-opensource-6.1.5.tar.gz
(-L is necessary to ensure curl follows the redirect to the respective mirror on SourceForge, took me a while to figure that out…)

2) Unpack the tarball:
tar -xvzf virtuoso-opensource-6.1.5.tar.gz

3) Set compiler flags (check out the Make FAQ for a list of settings on other systems)

  • CFLAGS=”-O -m64 -mmacosx-version-min=10.7″
  • export CFLAGS

4) Configure and install:

  • ./configure
  • make
  • sudo make install (the instructions say it installs to /usr/local/ by default, the resulting path is /usr/local/virtuoso-opensource)

5) Add path to the bin directory to the PATH environment varibale in ~/.profile:

Open text editor and add:
PATH=$PATH:/usr/local/virtuoso-opensource/bin/

Starting Virtuoso and importing data from a file

1) Add directory which contains data file to virtuoso.ini:
sudo emacs /usr/local/virtuoso-opensource/var/lib/virtuoso/db/virtuoso.ini
>> Add the directory path to DirsAllowed parameter, e.g. in our case /Users/fishdelish/fishbench/tests/testfish.n3

2) Start the Virtuoso server:

  • cd /usr/local/virtuoso-opensource/var/lib/virtuoso/db/
  • sudo virtuoso-t -f (or use sudo virtuoso-t -f & if you want to start it independently from the shell you’re using)
  • (virtuoso-t will read the virtuoso.ini file in this directory)

3) Import data:
(see some information and screenshots here:) http://www.proxml.be/users/paul/weblog/3876f/

Connect to DB to get an SQL prompt:

  • isql <HOST>[:<PORT>] -U username -P password
  • or simply isql 1111 myuser mypassword, this connects to the default port 1111

Import data (from n3 format, otherwise use DB.DBA.RDF_LOAD_RDFXML_MT from RDF/XML)

4) Access via http: 

Shutting down the server
Open SQL prompt and use command SHUTDOWN;

When the server isn’t shut down properly, there might be problems starting up next time. Manually removing virtuoso.lck in the virtuoso/db directory can solve this.

Get Your Triples On: Installing 4store on a Mac Mini

For a recent project, we had to install a selection of RDF triple stores on a Mac Mini, which had literally just come out of the box. Since it was a bit of a mission to get everything up and running, I thought I’d better keep track of what I did. Here’s the steps taken to prep the machine and set up 4store  – it looks pretty long, but if everything works (if…), it shouldn’t take more than 15 minutes. May the odds be forever in your favour.

Hardware: Apple Mac Mini (running Mac OS X Lion 10.7), out of the box

Install XCode, Command Line Tools, and Java on the Mac:

  • Install XCode via the AppStore (if you can only access remotely, use screen sharing)
  • The command-line tools are not bundled with Xcode 4.3 by default. Instead, they can be installed optionally using the Components tab of the Downloads preferences panel in Xcode.
  • Change the XCode Developer directory (which no longer exists in 4.3) to the new directory:
  • sudo /usr/bin/xcode-select -switch /Applications/Xcode.app/Contents/Developer/

Install Fink on the Mac to be able to use apt-get etc. (needs XCode + Command line tools)

Install dependencies using Fink

  • List of dependencies on: http://4store.org/trac/wiki/Dependencies
  • apt-get doesn’t find the right packages, so you have to use the fink tool to install them manually:
  • fink install automake1.11
  • fink install autoconf2.6
  • fink install glib2-dev
  • fink install make
  • fink install pcre
  • fink install pcre-bin

All other libs seem to be installed already. Then set your .profile file to init fink on startup:

  • open ~/.profile file with your text editor of choice:
  • . /sw/bin/init.sh

Install 4store
(I mostly followed the instructions here: http://fishdelish.cs.man.ac.uk/2011/installing-4store/)

1) Download and install Raptor

Raptor is an RDF syntax library, provides parsers and serializers.

2) Download and install Rasqual

Rasqal is a library that handles RDF query languages, e.g. SPARQL, supports all of SPARQL 1.0 and most of 1.1.

Make sure both rasqal and raptor have a .pc file in their directories. If not, you might have forgotten to run configure which should generate the .pc file from .pc.in.

3) Set environment variables so that the 4store install can find raptor2 and rasqal

Set to the directories which contain the raptor2.pc and rasqal.pc files:

  • open ~/.profile file with your text editor of choice:
  • PKG_CONFIG_PATH=/Users/fishdelish/fishbench/rasqal-0.9.29:/Users/fishdelish/fishbench/raptor2-2.0.7

4) Download 4store tarball (latest version on http://4store.org/download/) and install:

  • tar -xvzf 4store-v1.1.4.tar.gz
  • cd to the 4store directory
  • ./configure –enable-no-prefixes
  • Configure should run without error messages, i.e. raptor2 and rasqal are found if they environment variables are set correctly.
  • make && sudo make install
Congratulations! 4store should now be installed on your machine.

Run a series of tests to see whether 4store works:

  • make test (or make test-query, make test-httpd
  • tests should pass with [PASS], although some of them failed for me and the actual store worked fine

Create a triple store once 4store is installed
http://4store.org/trac/wiki/GettingStarted

1) Setup the DB:
4s-backend-setup testfish

2) And start the DB backend: 
4s-backend testfish
(Stop the DB: pkill -f ‘^4s-backend testfish$’ )

3) Import a test file:
(I just used a few triples I copied from from http://www.w3.org/TR/rdf-testcases/#ntriples)
4s-import -v testfish –format ntriples testfish.n3

Important: Import doesn’t work if the httpd is running. Also, make sure there’s no line breaks in the .n3 file.

4) Start http server for SPARQL endpoint and nice HTML frontend for tests:
4s-httpd testfish
(to kill the server, e.g. to import data: killall 4s-httpd)

That’s it. You should have a working 4store install and a sample DB now. Please be warned that I can’t guarantee that everything will work as it should if you follow these instructions 🙂